Are you ready for a smoother you this Spring? If so, get prepared with Amazon’s best at-home waxing kit for silky, smooth skin from Tress Wellness!
Warmer weather is amongst us. And depending on where you live, this could mean cute capris, sexy sundresses, strappy sandals, stylish shorts, and trendy tank tops-at least it does for me.
With this seasonal wardrobe change, many of us will start thinking about going to the gym and personal grooming as no one wants to look like the Grinch from Christmas with that crazy, undesirable body hair in the Spring!
So if you are ready for a smoother you and to wax like a pro in the comfort of your own home, continue reading.
Tress Wellness Complete Waxing Kit
Finding a reliable waxing kit can get a bit, um…hairy. So I searched the web for the best home waxing kits and found one on Amazon!
I was able to take my at-home waxing game to the next level with Amazon’s #1 Best-Seller Waxing Kit, the Tress Wellness Complete Waxing Kit!
Yeah, I know waxing can sound a bit daunting, but beauties, it is much easier to remove that body hair than you think with the help of the Tress Wellness spa-level at-home waxing kit.
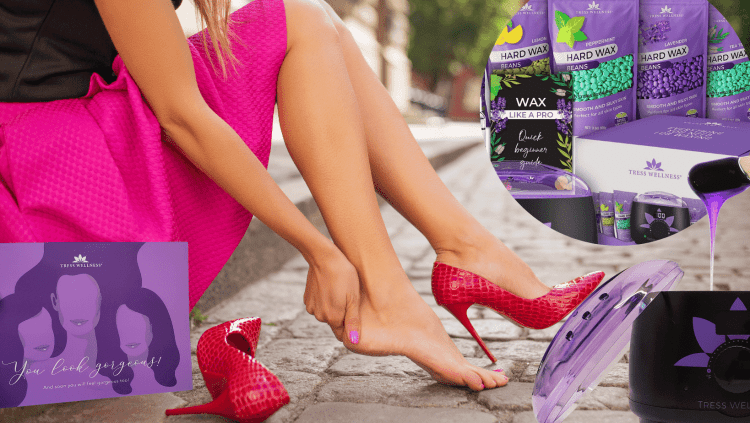
From your lips to your legs, you can basically set up a waxing salon at home with this kit full of all the essentials, which is why I love this system as they have thought of everything.
- A wax warmer that has a digital display and auto shut-off, so it’s safe to use
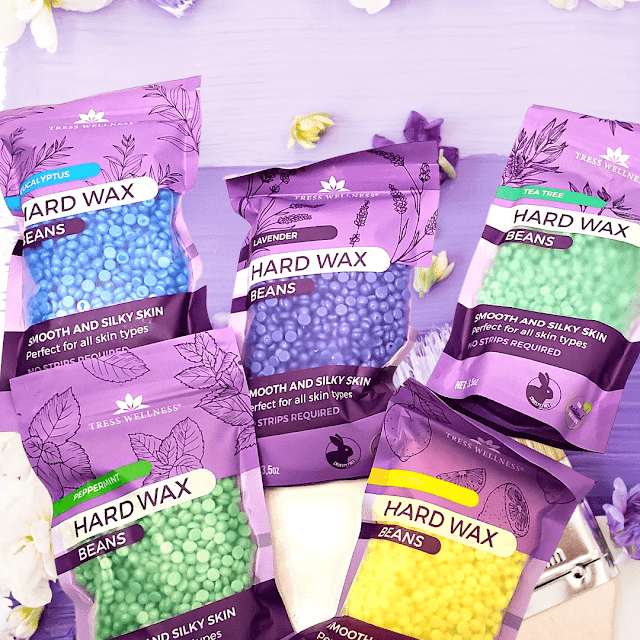
- Five 100% cruelty-free different waxing beads (lemon, eucalyptus, lavender, tea tree, and peppermint)
- Pre-wax and post-wax spray to cut the oils and soothe after
- 20 waxing sticks and ten eyebrow waxing sticks for precise wax application
- Transparent cover lid to help you monitor the meltdown of the wax
- Removable pot for easy cleaning
- LCD temperature display screen for perfect visibility
- Five protective rings that fit around the warmer to keep it clean
- User manual (very beginner-friendly)
Hair Today, Gone Tomorrow…Literally
I was initially hesitant about using an at-home waxing kit as I had a horrible experience at a reputable spa with a bikini wax. The bikini wax was a last-minute purchase after getting my hair styled. I later learned the problem was my hair in my bikini area wasn’t long enough, and it ripped off skin instead! Guess the technician should have mentioned that.
Hence today, I want to make sure you are prepared, regardless of which body area you are trying to free the fur! Preparation is crucial, so you do not end up as I did from a botched salon wax.
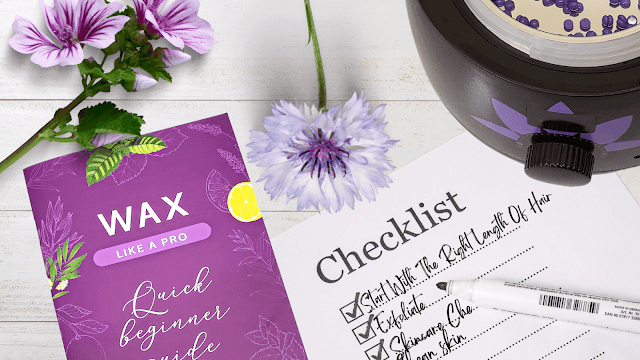
This is another reason I love the Tress Wellness kit, as they provide you with a user-friendly beginners guide that answers all and any questions you might have, allowing you to enjoy hair free perfection! (Plus, now your legs and a cactus won’t be the same texture).
Ways To Prep Before You Wax
Start With The Right Length Of Hair
This is what got me, so I made sure that I had plenty of hair to spare when I used my new Tress Wellness Waxing set!
Minimum is 1/4 inch hair length, which is about the size of a grain of rice. This will also ensure that the wax has something to grasp. Allowing the hair to get completely removed from the root instead of the skin.
Exfoliate Before Your Wax
You want to remove any dead skin cells that surround the hair follicles. Exfoliating helps loosen existing ingrown hairs and improves your waxing results.
IMPORTANT: To keep irritation to a minimum, avoid chemical exfoliants before waxing. Instead, use something mild like exfoliating mitts or gentle body scrub.
Dial Back On Your Skincare
While above, I did say avoid chemical exfoliants beforehand. I realize not everyone knows what this means.
So to be a bit more detailed, you also want to avoid retinol products, chemical peels, and treatments like microdermabrasion.
Start With Clean Skin
Always start your waxing session with freshly washed and dry skin. Clean the area you want to wax, as there should not be any moisturizing cream, oils, deodorant, etc., applied to the place you are planning to wax.
Avoid Tanning
The waxed skin is more susceptible to UV rays, leading to sun damage and hyperpigmentation. So tanning is not recommended before or at least 48 hours after waxing. Plan accordingly if you are waxing for a trip to the beach.
Avoid Caffeine And Alcohol Before Waxing
These zap moisture from your skin, causing your hair to cling more tightly to its dehydrated follicles. Instead, pamper yourself after with a glass of wine, not before!
Do A Patch Test Prior To Waxing
Beauties, nothing is worse than a burning hoo-ha. So make sure to do a patch test before applying hot wax, and I suggest the same if you are doing your upper lip or eyebrows.
Avoid Sex Right After
Oh, how nice to share your sexy smooth body with your significant other. But you need to wait!
So plan accordingly. No day of anniversary waxing! Unless you just want to be cuddling!
Real Easy, Real Results,
User Waxing Instructions
Now that you are all prepped, you are ready to eliminate those hairiest concerns! See the steps I took below…
Prepare The Wax
The wax should have a uniform consistency. Kind of like thick honey or molasses. The temperature to heat the wax is around 150-170 degrees. For areas with sensitive skin, you will love the ready color indicators.
Pre And Post Wax
Make sure to apply the pre-spray. I forgot the first time. And make sure it is dry before using the wax, so the wax doesn’t adhere to the skin and only adheres to the hair.
Cool The Wax Down A Little Bit Before Applying
Before applying the wax to your skin, check the wax warmer. It should not be too hot; otherwise, your skin will get burned. Also, if it’s too cold, it won’t spread properly.
Do A Temperature Test
I applied it under my wrist to check the temperature. NEVER use without doing a test, especially if doing the bikini area.
Start With Small Sections
For goodness sakes, we do not want a Tik Tok waxing fail. So make sure not to put wax on your wax area at once. It’ll make the wax dry and hard to pull, plus it won’t remove hair from the root.
Instead: Wait about 30-45 seconds until the wax is not sticky. Also, place pressure when applying to grab onto the hair and remove quickly. THIS is very important.

To Remove The Wax From Your Body
There are not any strips; the hard wax hardens and acts as a strip. To remove, keep the skin anchored in place, and never pull upward or outward to avoid pulling or tearing in the skin.
- The critical step to preventing ingrown hairs is to get the entire hair follicle. The best way for hair removal is by keeping your skin taut with your free hand and removing the wax strip quickly in the opposite direction of the hair growth.
- After removing your wax, always apply pressure to freshly waxed skin to immediately reduce any pain or stinging.
- After hair is completely removed, make sure to soothe and ease any inflammation with the post-treatment spray.
Barbie’s Personal Tips To Make It Better
How Wax Much To Get On The Stick
They call this the bulb amount, which is the accumulation of wax surrounding your spatula produced by twirling wax around like spaghetti on a fork. The bulbs should be the right size for your waxing area.
Your wax shouldn’t drip after about 2-3 seconds of twirling. If it does, your wax may be too hot, or your consistency may be off. If your wax is too thin or too hot, turn down your warmer temperature.
Practice Before Applying To Sensitive Areas
I removed some hair on my upper thigh to practice before doing my bikini area, or if you plan on using it on your facial hair, I suggest practicing as well. I highly recommend this, especially if this is your first time waxing yourself.
Gripping Piece In The Wax
It would be best to create an area at the end to grab to pull off (like a little lip or log). The first time I didn’t do this, it took a bit to grip it, causing irritation.
Missed Some Hairs
The wax strip needs to be removed in the opposite direction to clean up any missed hairs, especially some of the coarse hairs and do it in the DIRECTION OF THE HAIR GROWTH.
What I Liked About The Tress Wellness Waxing Kit
The first thing I appreciated was the guide that made this system so easy to use. The most important part to me is the preparation, as this is where many fail, resulting in a negative experience. But not with Tress Wellness. They thought of everything to have you prepped, informed, and ready for your HAIR FREE experience.
Secondly, this is the best-selling home waxing kit on Amazon, and for a good reason. The Tress Wellness kit includes hard wax beans, which grip the hair, not your skin. That means smooth skin with less pain than other kinds of waxing.
Thirdly, it’s very affordable compared to going to the salon and oddly satisfying (kind of like that Dr. Pimple, Popper TV show satisfaction), seeing those pesky removed hairs lying on the wax.
Currently, you can get this waxing kit for around $55. Amazon prime members can save even more as I just purchased one for my mom for Mother’s Day and got mine for under $50!
Lastly, no more irritation as the wax is formulated with natural ingredients. And it’s cruelty free!
So there you have it, beauties. Barbie’s Beauty Bits tips and experience with Tress Wellness Complete Waxing Kit. Amazon’s #1 Best At-Home Waxing Kit For Silky Smooth Skin.
Until next time!
Source by www.barbiesbeautybits.com


